Yesterday one of my very best friends, LJ, and her husband Dan welcomed their second beautiful baby boy to the world. That was enough to kick my butt into gear for writing this post, seeing as how this project was for Sweet Baby Sawyer! Okay, well, maybe his mama a little bit, because I doubt that he really cares too awful much about how his room is decorated. Although I totally know babies aren’t accessories, but I’m kind of jealous of that nursery she put together!
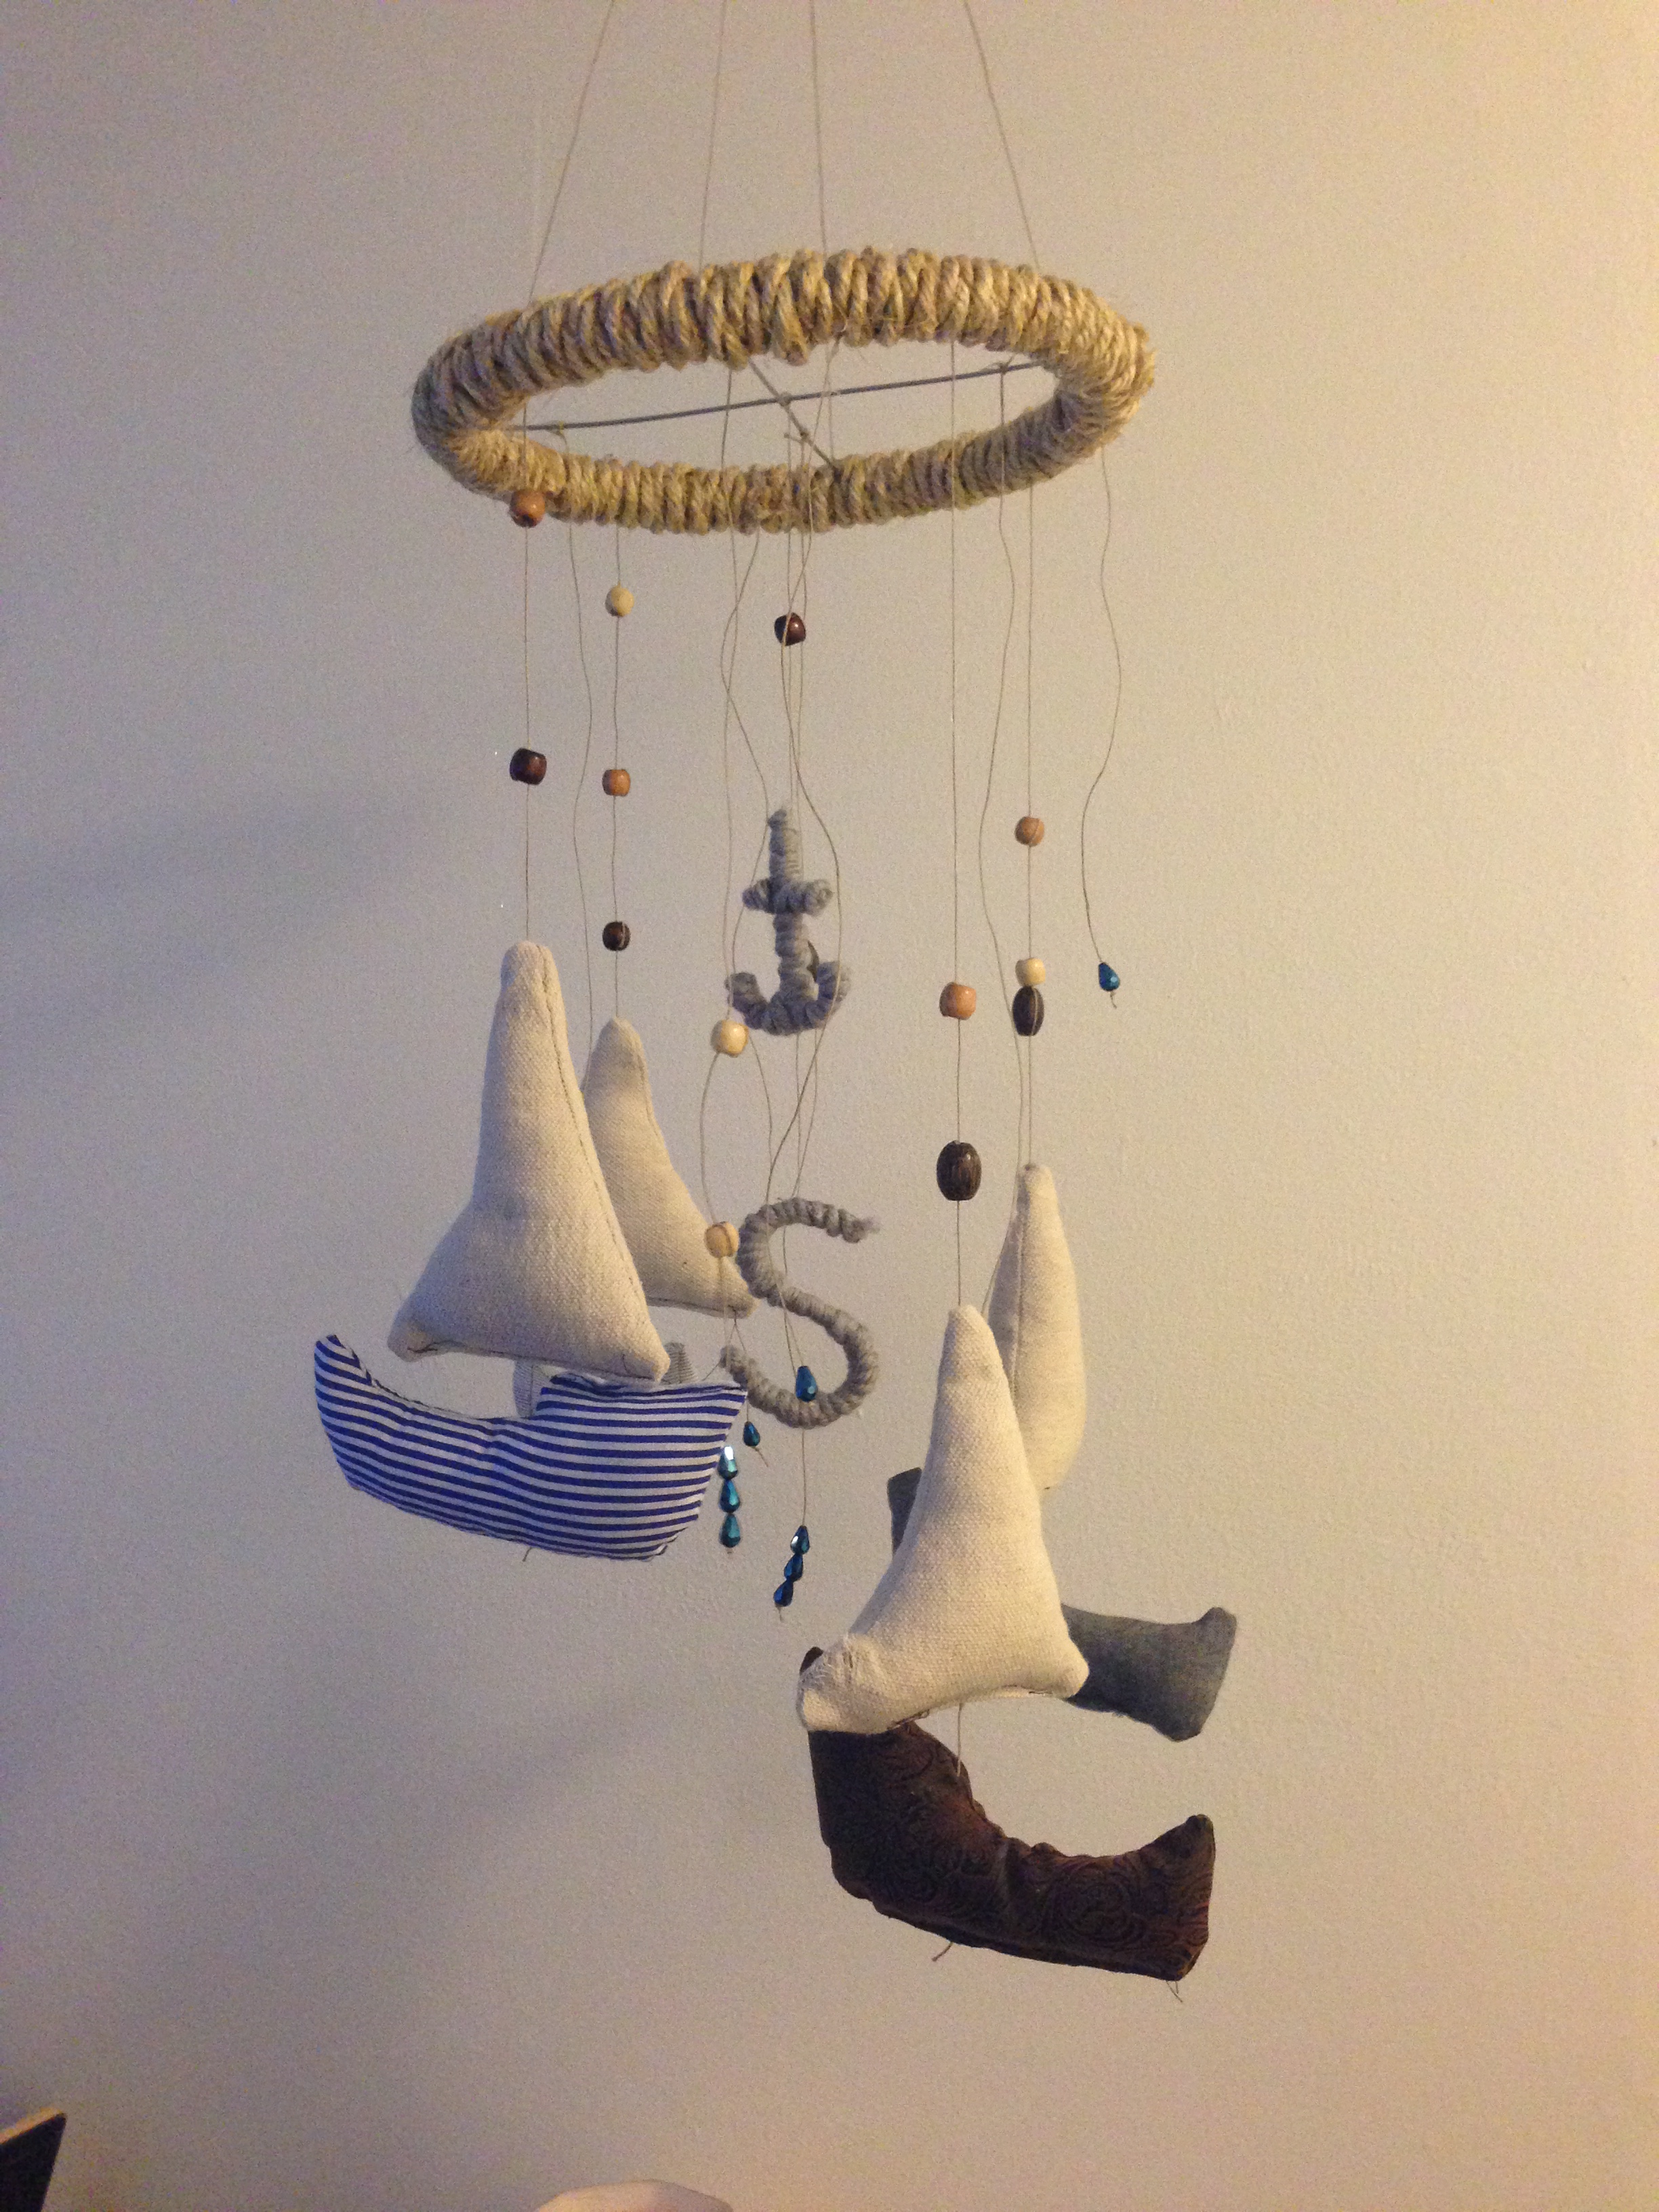
So I started first with one of those quilting/cross stitch rings. Unfortunately, I could only find the plastic ones at that point. No problem! We want to wrap it in rope for our nautical theme anyway. I also gathered some wire cutters and metal wire. The rope and wire both came from Walmart’s hardware section.

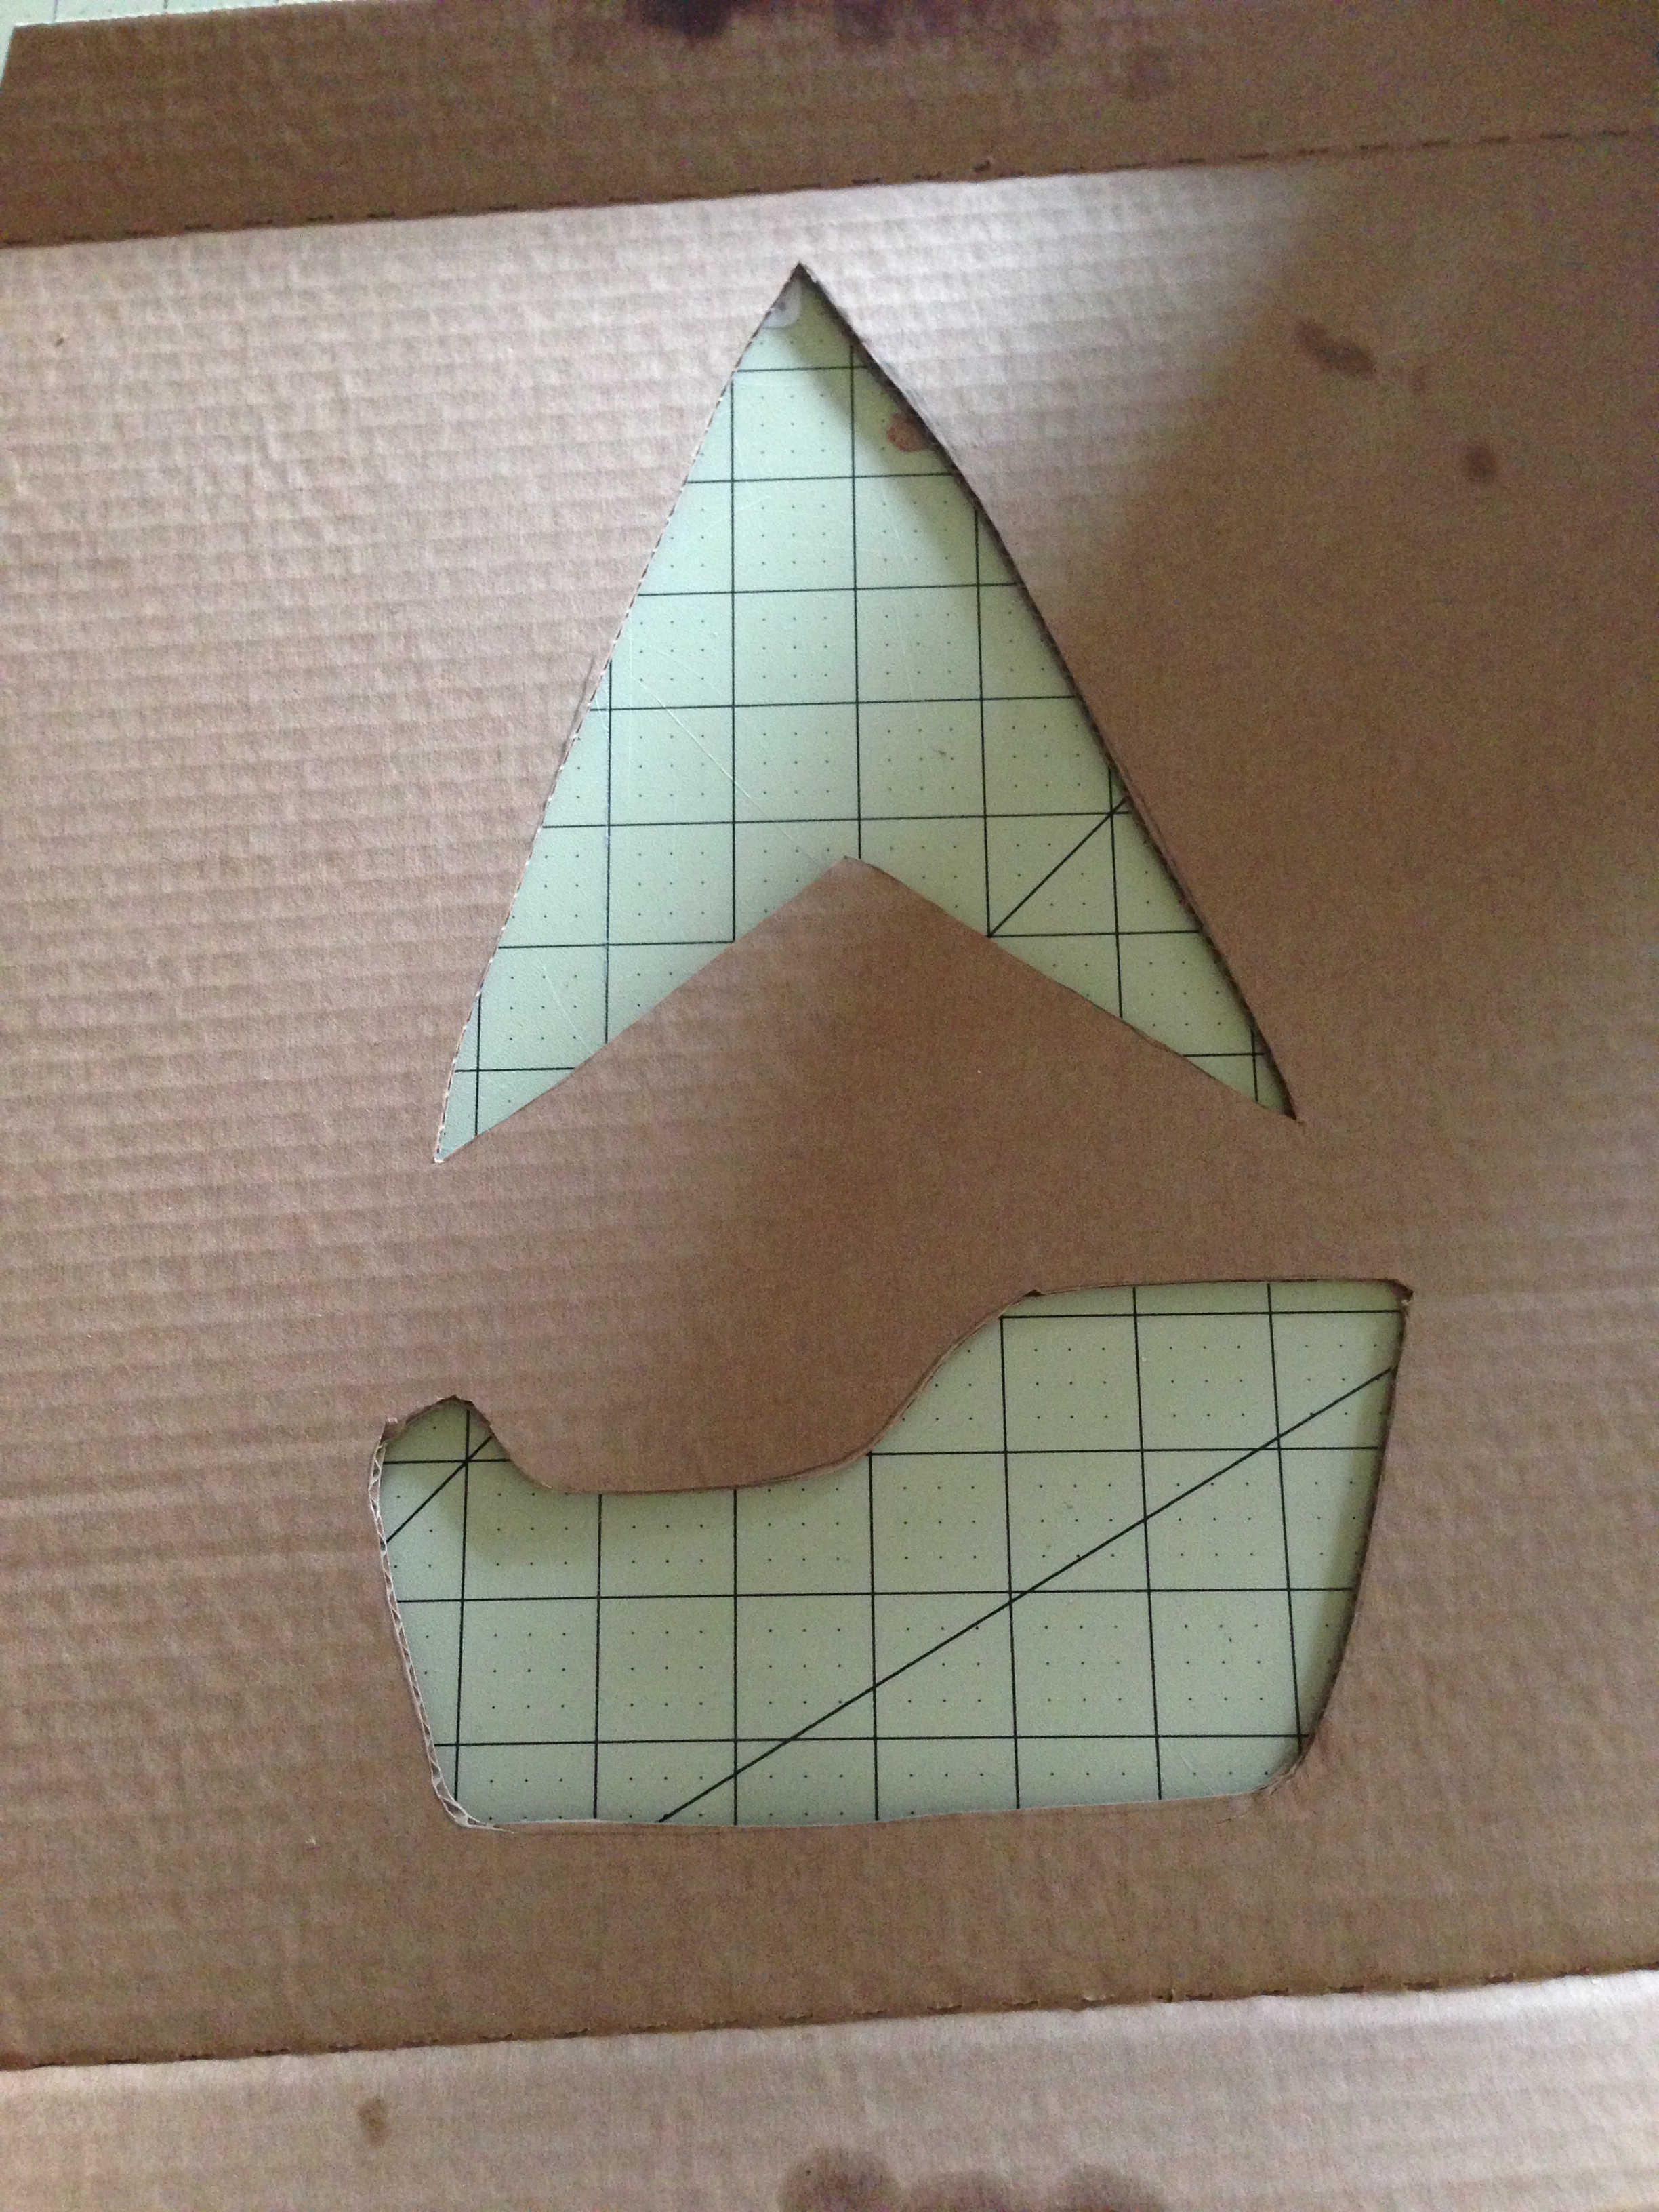
After I had the cross in the middle, I went on to making my boats. Now, I’m going to let you all in on a little secret: If you’re a novice at sewing as I am, give yourself a large seam allowance for these boats. I forgot to do that and had a heck of a time sewing the boats so they were not way too small. I did cut a pattern so I could make all the boats the same and the pattern looked something like this (yes, that’s an old grody pizza box. Reuse recycle, right!?):
As you can see, I made the sails (which I later got frustrated and just sewed them straight across) and boat bases separately so it would have more of a flow. The sail material is drop cloth and the boats are of different but coordinating materials I picked up.
So after painstakingly sewing them (because of my newbie mistake of the seam allowance), I put some very thin twine you find in the jewelry department and strung it through a needle. Then I stuck my needle right down through both the sail and then the base of the boat, making knots under each where I wanted them to stay. As the twine got more towards the top, I wound differing amounts of wooden beads along it for some other texture. Plus, she’s a natural kind of girl, and I knew she would appreciate the wood. I just tied the top of the twine around the ring and secured it with a dot of glue. Now, I wish I had take more photos of this… but I didn’t. And I’m sorry. But I hope my explanation for everything is making sense so far.
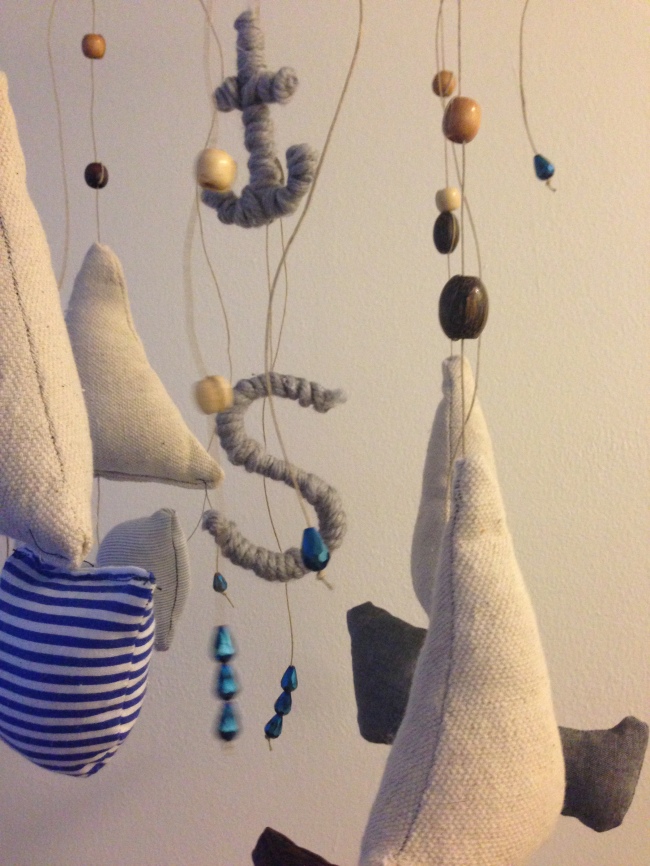
The next step I took was to cut twine at varying lengths and just string them in different places, including on the metal bar parts, and put a few blue iridescent beads at the bottom. I also put one down the middle and made a little initial S and an anchor from the same wire that the bars are made of in the center. Because it needed something a little more in my mind to make it softer like the rest of the mobile, I wrapped it in some grey yarn. Ahh.. just right!
Finally, we take the rope from earlier and wrap it all around the ring. I did do this in sections and made sure I used a lot of hot glue so it would stay in tact and match in at the starting and stopping points.

I left the twine hanging down still sort of curly from being on the spool, because I thought it gave this mobile a more whimsical look and more for the little darling to stare up at. I was happy with it, and, more importantly, LJ seemed happy with it<3

That’s it! Now I just can’t wait to meet the little babe. And if he is anything like their first born, Atticus, he will be a little heart melter!